One of our support engineers, Tyler Jurgens, recently demonstrated the process of backing up on-premises vSphere VMs with Veeam direct to a Minio S3 bucket and then recovering back to vSphere again.
We thought this would be a useful demonstration to share with our readers.
Use case: You have an on-premises vSphere environment, and you’re looking for a reliable offsite backup solution. Additionally, you want the ability to recover your virtual machines (VMs) to a cloud service provider in case of a disaster or disruptive event at your main site.
Now, the question is: How can you recover a VM to a new production environment in the cloud for an extended period while ensuring that your data can be restored to your on-premises infrastructure?
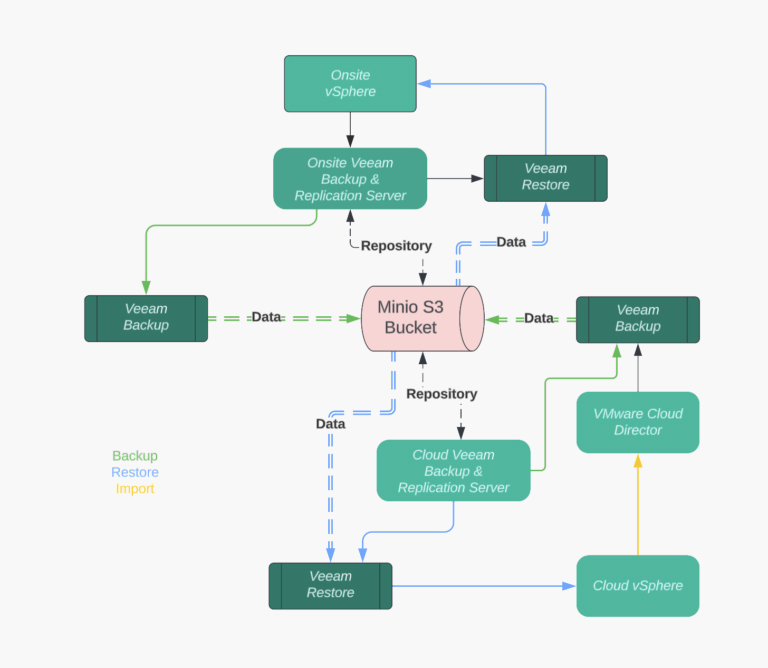
We will be leveraging the power of Veeam v12, MinIO, VMware vSphere, and VMware Cloud Director. Here’s how it works:
- Step 1: Back up your on-premises vSphere VMs using Veeam directly to a MinIO S3 bucket.
- Step 2: Once this initial backup is complete, you can proceed to restore the VM to a VMware Cloud Director ORG residing in the cloud. At this point, you have successfully replicated your VM to a cloud environment.
- Step 3: Back up the VM in the cloud directly to another MinIO S3 bucket.
- Step 4. Recover the VM back to your on-premises vSphere deployment.
By following this sequence, you can achieve the desired outcome of having your VMs readily available in the cloud during a disaster while still maintaining the capability to restore them to your on-premises infrastructure when needed.
It’s worth noting that while this approach provides a solid backup and recovery strategy, it’s important to be mindful of potential costs. Some Object Storage Services may impose data Ingress and Egress charges, which could impact your budget. It’s crucial to be aware of any possible “hidden” costs associated with the use of such services. Stay informed and make the best decision for your specific requirements, keeping in mind that the recovery time objectives (RTOs) may not be identical to a full replication setup.

Add your S3 Storage
The first step here is connecting your on-prem VBR server to your MinIO bucket. The process is as follows:
Backup Infrastructure -> Add Repository -> Object Storage
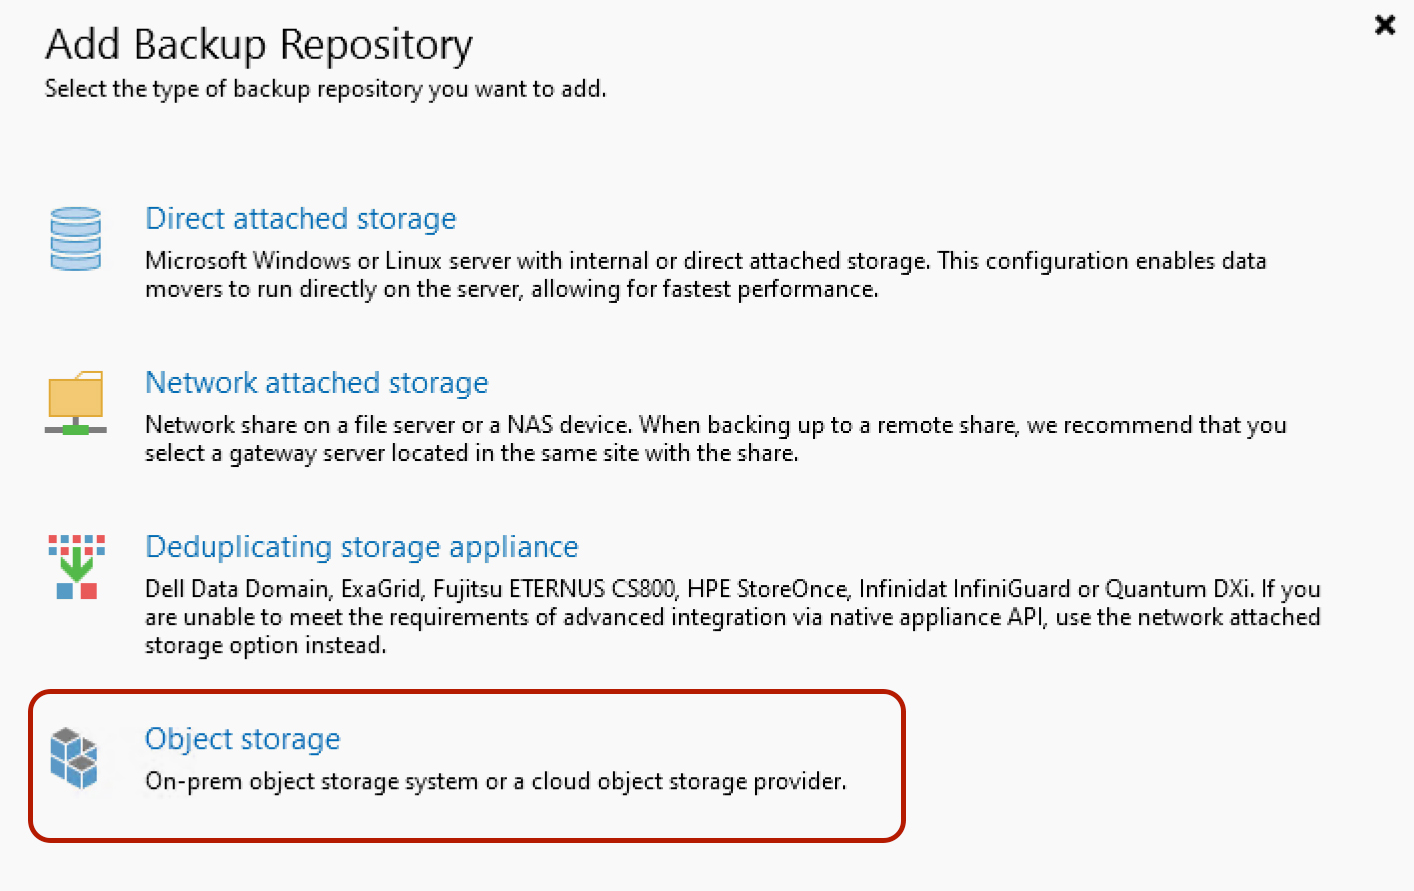
Next, select “S3 Compatible” from the following screen and name your bucket.
Choose a name that suits your needs, is easy to remember, and is relevant to what you’re storing.
Now you’ll need to enter some data that will be given to you by your object storage vendor. In our case, we’re using MinIO S3 Compatible Object Storage. Remember to add in your credentials exactly as they were provided.
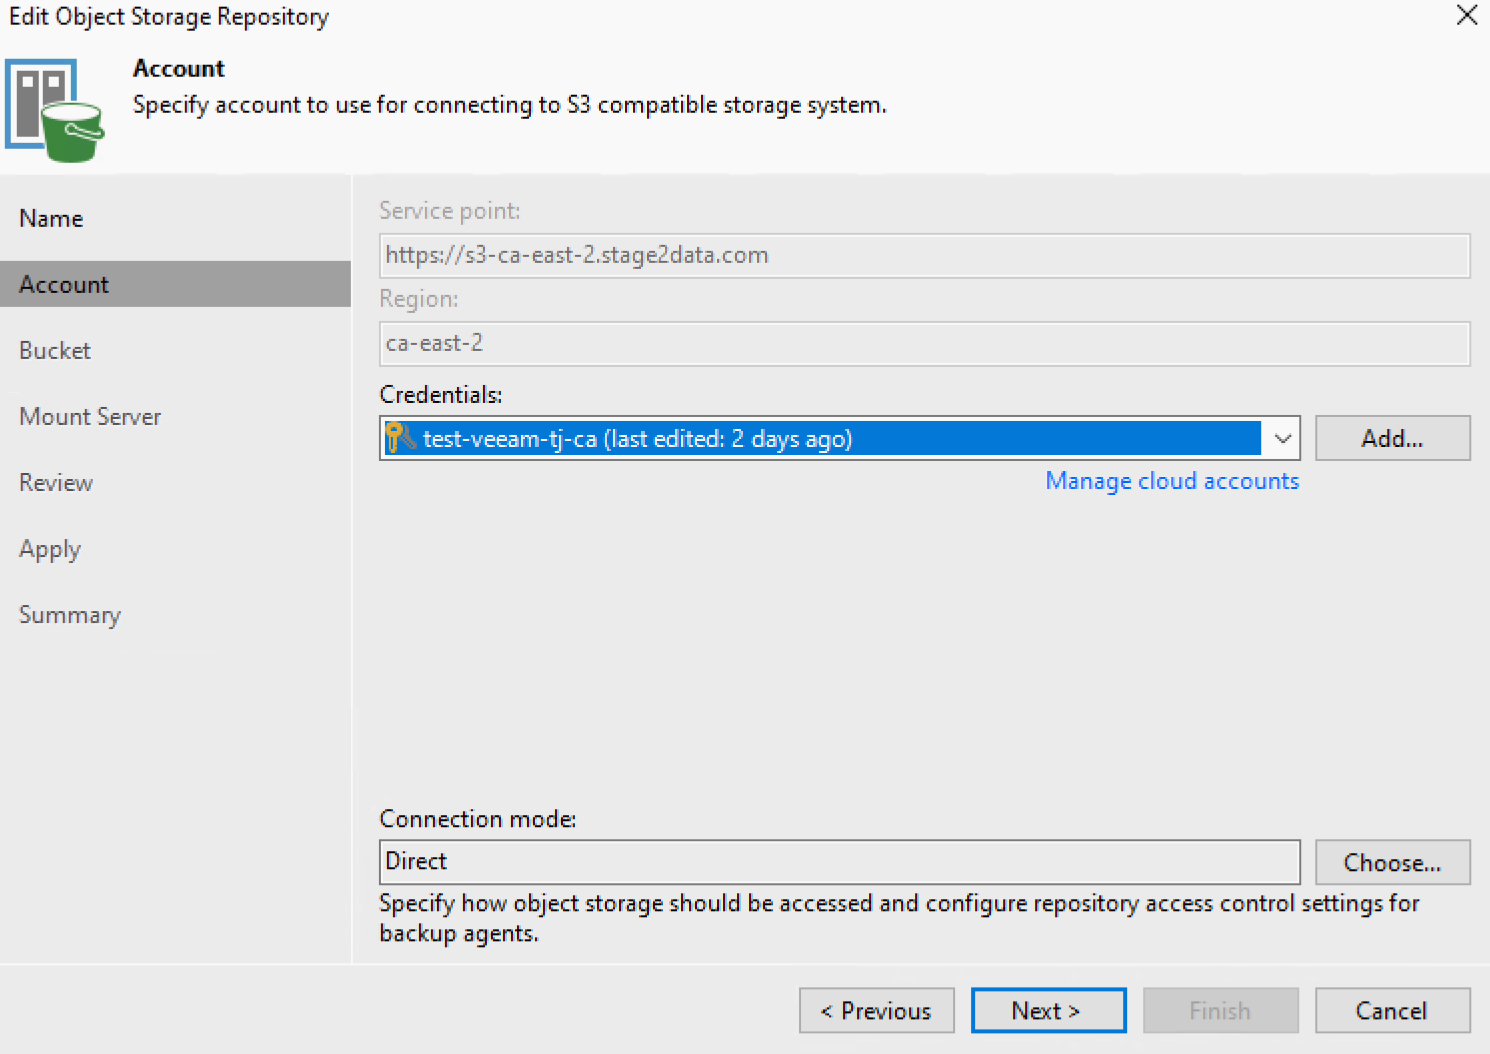
Remember to keep track of the bucket and folder you’re using here – you’ll need that later!
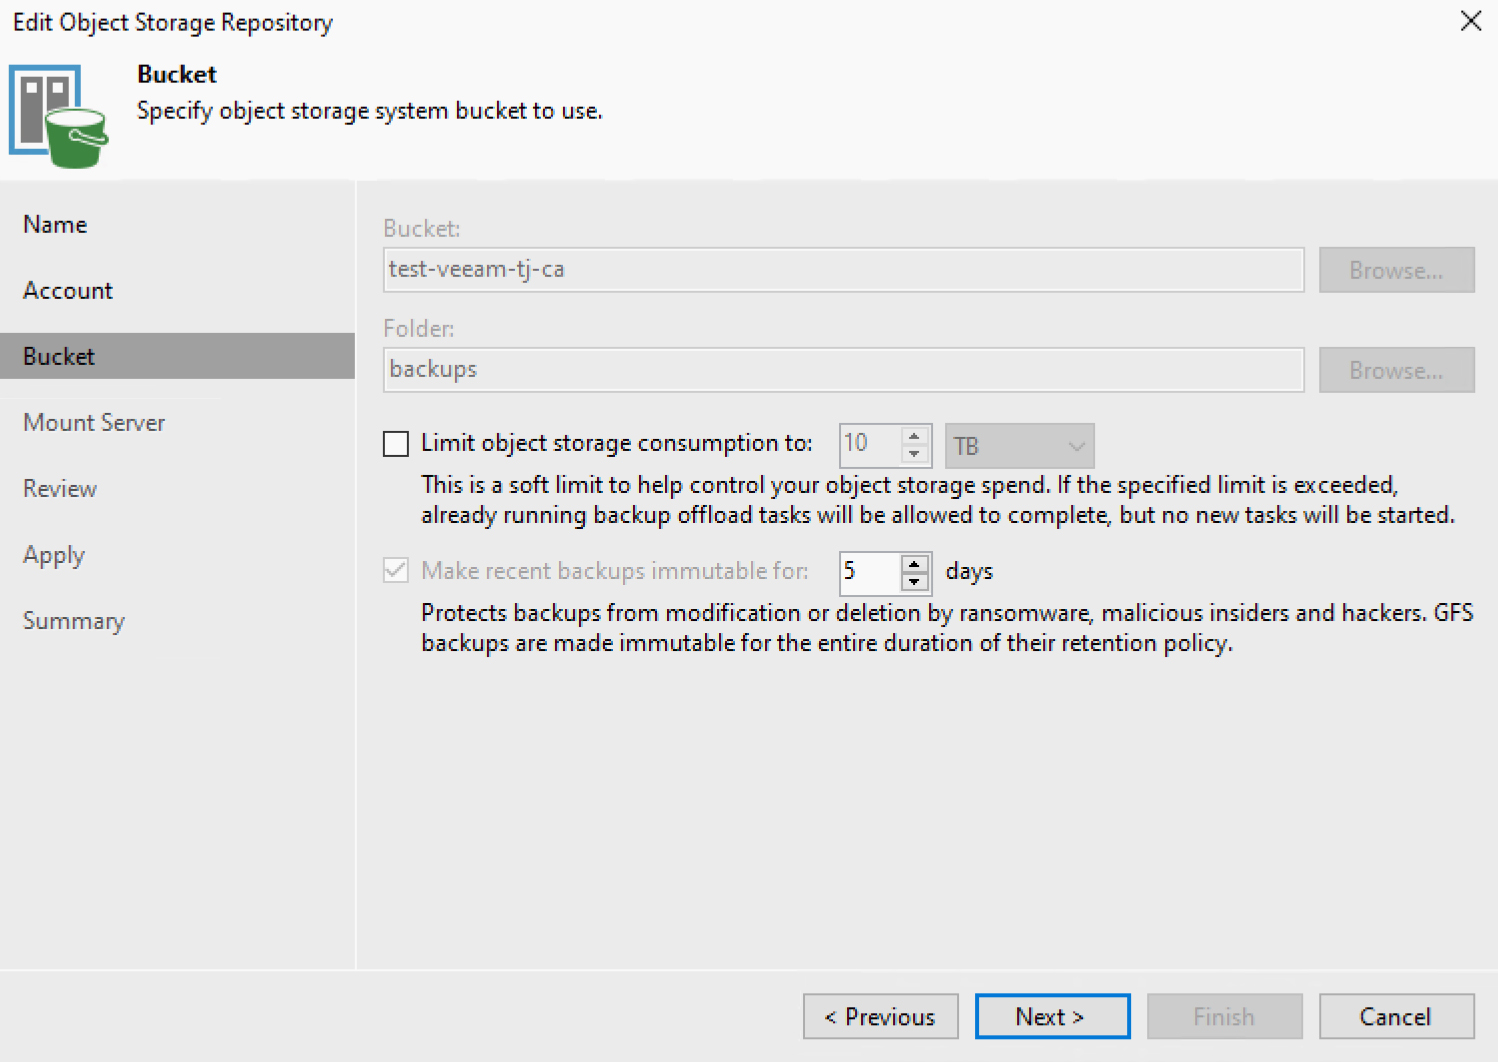
The rest of the steps are pretty straightforward, and we recommend using the defaults as presented by Veeam.
Create a Backup Directly to MinIO S3
Backing up your data directly to MinIO S3 is as straightforward as backing up to any other block storage device. Just remember to choose the repository you created in the previous steps.
One vital point to consider is the block sizes on MinIO. While they don’t significantly impact performance – thanks to MinIO’s exceptional speed – they do play a role when it comes to maintenance. If you’re responsible for your own MinIO cluster, you’ll eventually have to deal with a failed disk. The healing process can be prolonged by block sizes – the smaller the blocks, the longer it takes to restore a failed drive.
Though MinIO supports Veeam’s SOSAPI, Veeam doesn’t yet utilize the block size recommendations provided by object storage vendors like MinIO through Veeam’s SOSAPI.
To give you more context, Veeam’s SOSAPI allows object storage vendors to share additional information not usually provided by object storage – details like Capacity, Free Space, and suggested block sizes. However, Veeam hasn’t yet implemented a feature that uses this information to manage default block sizes for backup jobs. This means that while MinIO tells Veeam what’s the ideal block sizes to use, Veeam doesn’t currently use that advice. We hope to see this feature introduced soon!
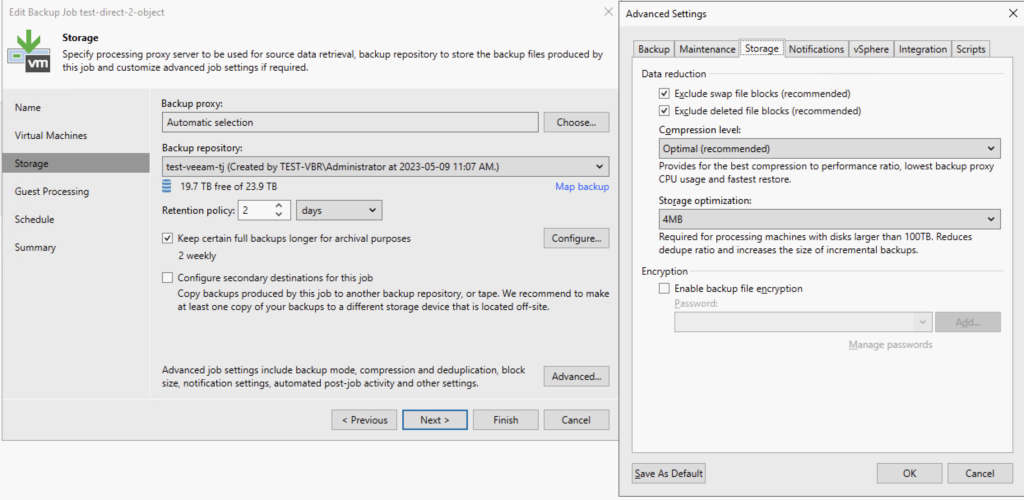
In the meantime, we recommend increasing the block sizes on your Veeam backup jobs that are sent offsite to MinIO S3. This will make your vendor’s job easier, and if you’re managing it yourself, you’ll be grateful too.
You can do this in the Storage section of your Veeam backup job. Simply select Advanced and set your Storage optimization to 4MB. It’s worth noting that while it’s possible to unlock 8MB blocks through a registry change, MinIO recommends a 4MB block with their SOSAPI implementation, so we suggest sticking with that.
Once you’ve successfully completed at least one full backup, you can now take the next step and restore these backups to a cloud provider. For this process, you’ll need assistance from your cloud provider.
There’s quite a bit of technical work required in the background to recover the VM to vSphere, and then import it to VMware Cloud Director. So, don’t hesitate to reach out to us for support as you navigate through these steps.
Recover your Backup with Stage2Data
As previously mentioned, your service provider will be the one to carry out these steps. If you’re partnering with us, for example, we’ll make sure to execute these steps efficiently to get you back on track in no time!
Here’s what we’ll do:
- We’ll set up (or use an existing) Veeam Backup and Replication Server that already includes the cloud provider’s VMware Cloud Director in its inventory.
- Then, we’ll add the MinIO bucket that was used earlier for creating the backups. Your MinIO provider has two options here: they can either create a new user to access your MinIO bucket or use your existing user credentials.
You should remember that when connecting to an existing MinIO bucket, Veeam will trigger a warning message. Don’t worry, this is normal and just part of the process.
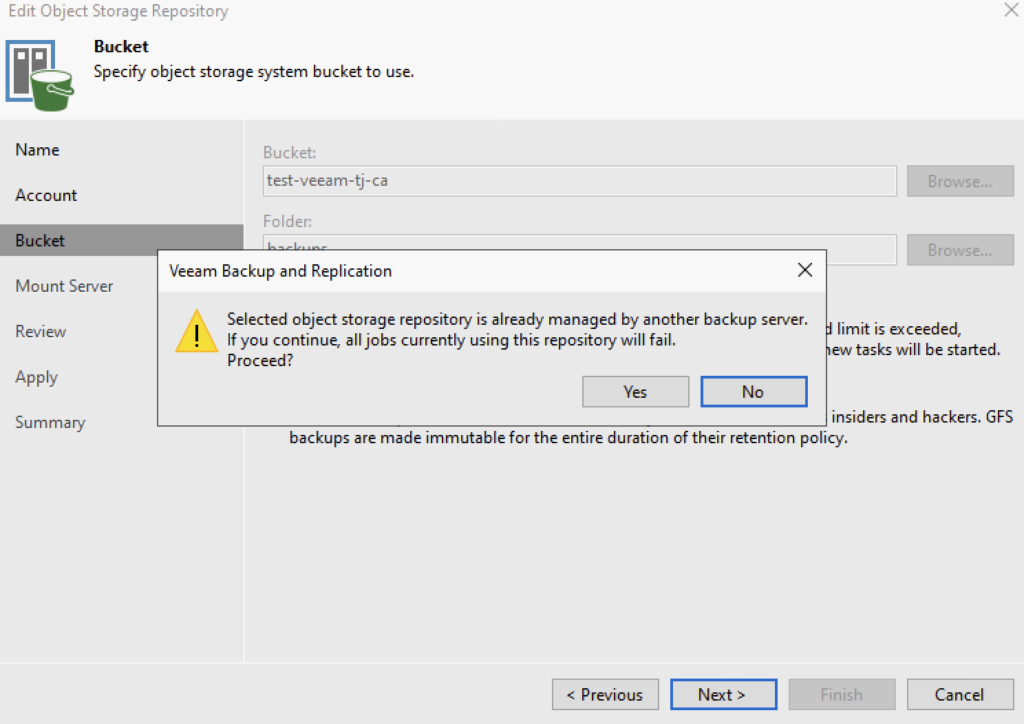
Here we’ll click “Yes” so the recovery VBR can claim ownership of the MinIO bucket, preventing any other Veeam server from accessing it – a necessary step to avoid data corruption. In this scenario, we know that the original VBR won’t be writing to that bucket anymore as the primary site is experiencing a disaster. So, there’s no need to worry. When we restore the original VBR, we can reclaim ownership of the MinIO bucket.
Next, we’ll initiate a VM recovery to the Cloud vSphere environment. Unfortunately, Veeam doesn’t currently support a direct restore from a vSphere VM to VMware Cloud Director, so an intermediate jump to vSphere is required. We won’t provide a detailed guide on how to recover a VM, but it follows the same steps you’d take for any other VM. For this tutorial, we didn’t attempt an Instant VM recovery, instead opting for a full VM restore.
Once the restoration is complete, you’ll have a VM available in the Cloud Provider’s vSphere environment. Now we can give the customer access to their VM using VMware Cloud Director. Follow these three steps:
- Log into VMware Cloud Director
- Choose the Org VDC you wish to import the VM into
- Open the tenant portal.
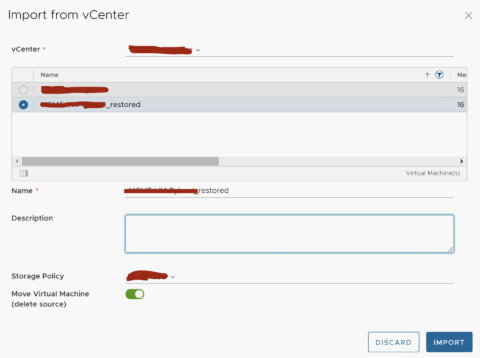
From the tenant portal, choose your vApps and select “Import from vCenter”.
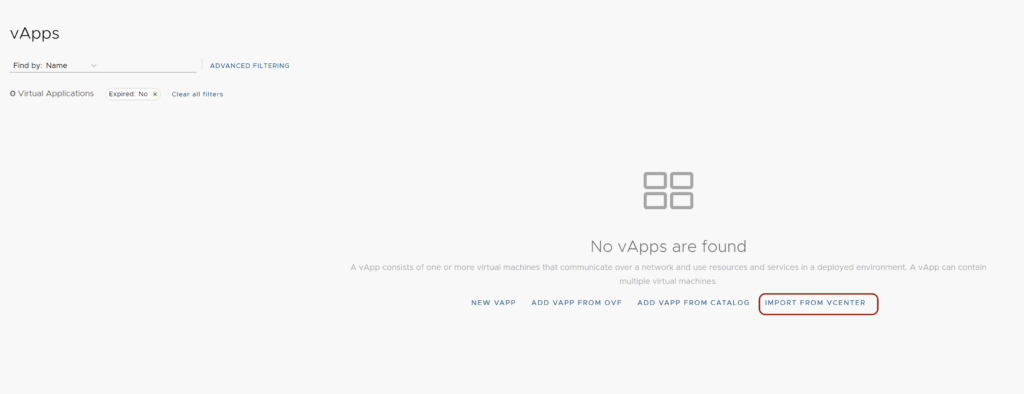
Locate the VM you restored in the steps above and import this into your VMware Cloud Director tenancy. You can select the option to Move Virtual Machine (delete source) since you won’t need the vSphere version after it has been restored to VCD.
Once the import is finished, your VM is ready to roll. However, you’ll probably need to adjust the networks within the VM to align with your ORG VDC networks. Remember, this process will get you up and running, but it won’t necessarily be a speedy process!
Ideally, Veeam will enhance their restore process to allow direct recovery of a vSphere VM to Cloud Director. This change could significantly reduce the time it takes to get a VM operational. Veeam has received this suggestion before, and it’s “on the table for future improvements”. It might be included in the next release, or it may never come to fruition.
Once the network is fixed, you’re all set to power up the VM and get to work! You’ll want to repeat these steps for any additional VMs you need to recover, but now you have a clear roadmap!
Congratulations! You’ve recovered from your disaster. Your VMs are live and operational. Things are looking up again.
You’ve restored your on-premises servers. Your environment is back on its feet … but hold on, you’ve been operating in the cloud during this period. So, what’s the next step?
Back Again
At this stage, you have a vApp and a VM. The next step is to create a backup job that will take the VM you just imported into vSphere and back it up into the MinIO bucket again.
This process is quite similar to creating any other VM backup.
However, there’s one catch. VMware will generate a new unique ID for the VM. As a result, backing up that VM and linking it to the existing backup job won’t update the existing VM backups with the new data as one might hope.
To keep things neat and tidy, we recommend creating a new backup job and targeting the VCD VM. Restoring a VCD VM backup direct to vSphere is possible; the only difference is that Veeam keeps the VCD metadata alongside the backups.
After this backup is completed, you can follow the same steps as before – reconnect your (new or restored) VBR to your MinIO bucket, rescan the repository to discover all backup jobs, and then carry out a restore back to your on-premises environment.
Final Thoughts
Using Veeam v12 in combination with MinIO Object Storage through Stage2Data is a great way to ensure your backups are securely stored offsite. With a bit of extra effort, you can leverage MinIO’s robust and high-performing storage as an added safeguard in your disaster recovery plan.
Remember, it’s always best to stick to the industry-standard 3-2-1 backup rule. While this tutorial illustrates going directly to object storage, you can follow the same principle using backup copy jobs instead. It’s all about maintaining a secure and reliable backup strategy for your data.
Get in touch with our expert team to help you back up your on-premises vSphere VMs to a MinIO S3 bucket.
If you found this post interesting, you might enjoy these too: